The most awesome, paper-crafted, Christmas photo card. Ever.

Back in a post from early November, I referred to the fact that I was formulating a design for a photo Christmas card. Well, behold our family’s Christmas card for this year:

xmascardphotofront copy

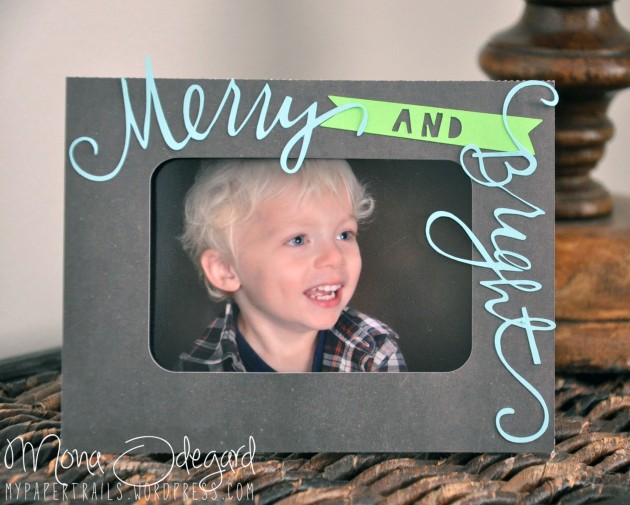
I purchased a frame shape from the online Silhouette store. With some slight adjustment to the inner frame, it was perfect for a wallet-sized photo.  I also purchased some new Christmas sentiment shapes, and despite their delicacy, they cut surprisingly well.

The frame has a pop-out stand on the back:

xmascardstandback copy

Here is how it looks from the side:

xmascardstandside copy

Using the Silhouette’s print and cut feature, I made a custom family newsletter insert that simply slides out from behind the photograph:

xmascardsliding01 copy

xmascardsliding02 copy

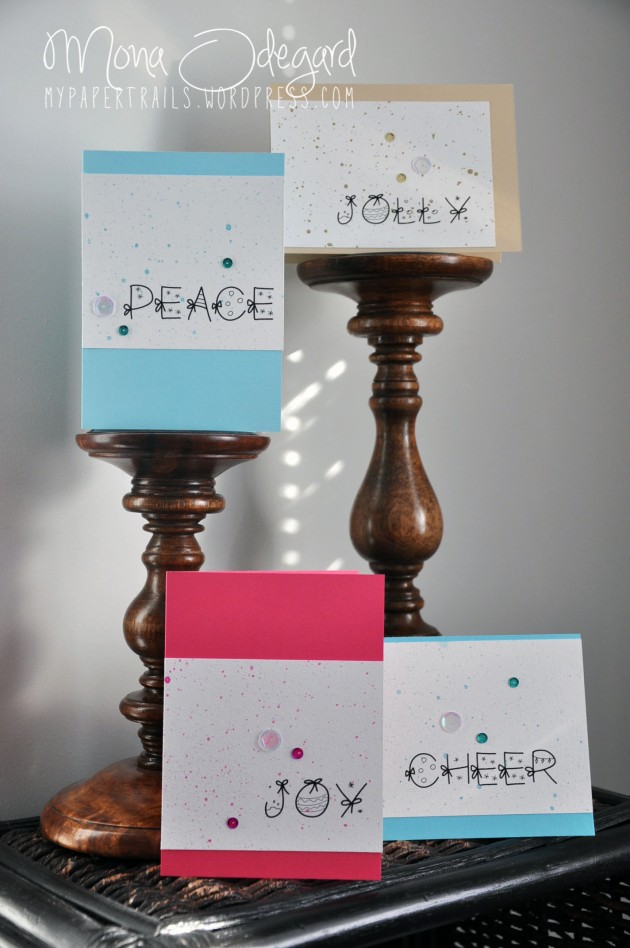
I used a coordinating Christmas card stack that I found at Michael’s and made several different versions:

xmascardallfour copy

These Christmas card frames were a GREAT way to share with family those small, wallet-sized images that came with a portrait package we had taken of my son back in the Fall. (Yes! Multi-tasking!)

And if there was any question as to how to proceed with the photo card once it was opened,

xmascardinsert copy

I included an instruction sheet!

Happy Holidays!!!

Supplies used:
Silhouette Cameo/Shapes – 3d standing frame – rectangle, merry and bright phrase, merry christmas phrase
Fonts – CK Tipsy (all caps)
Paper – 12×12 DCWV Home for Christmas

Christmas is coming….

Are you ready? I definitely am – I have our decorations up, our presents wrapped, and the front of our house is decked out for the first time EVER!

Here is a collection of four holiday cards –

xmasnotecoll-02

I was inspired by Lucy Abrams’ Inked Christmas Card Set in this month’s Paper Crafts Magazine –

Image source

Some special features of these cards include….

*Unique colored card – I loved going with the bright colors of pink, blue, and shimmery gold as an alternative to the traditional Christmas colors of red and green.

xmasnotecoll, pair01

*Sentiment using PW Christmas Font – I went with this bold, Christmasy font to really emphasize the single word sentiments of Joy, Peace, Cheer, and Jolly. I used my Silhouette Cameo’s print and cut feature to position and print the text directly onto sheets of watercolor paper.

xmasnotecoll, pair02

*Ink splatter technique – I tried recreating Lucy’s ink splatter that she describes in her project. I didn’t use a craft sheet like she indicated, but rather an acrylic stamping block to apply the ink and spritz with water. I flung the ink onto the paper with a paintbrush just as she described and achieved a nice snowy effect with the ink splatters.  This is definitely a technique that I’m going to be playing around a lot more with in the near future.

xmasnotecoll, peace

*Watercolor paper – I don’t know if it’s the type of cardstock that I use, but I never have much luck using it for ink splattering – the ink mixture runs and makes the paper bubble up and, quite frankly, just looks yucky. My go-to for any kind of water-related inking project is watercolor paper. It’s sturdy, it’s printable, it has a slight texture, but it makes the ink look great and maintains a nice, flat surface.

xmasnotecoll, jolly

*Matching envelopes – I custom made the card base using colored cardstock, so I had to make matching envelopes. I suppose I could mix-and-match the envelopes if I were feeling particularly bold….

xmasnotecoll, env01

xmasnotecoll, env02

*Inside sentiment – I stamped a basic sentiment inside the card along with a happy little snowflake. (Yeah, Bob Ross fan here.)

xmasnotecoll, inside01

I particularly love how the gold ink turned out on the gold shimmer cardstock.

xmasnotecoll, inside02

Supplies used:
Paper – Recollections cardstock in Magenta, Light Blue, and Light Turquoise. Recollections 12×12 Shimmer Cardstock in Gold. Watercolor paper.
Ink – Color Box Pigment in Razzberry and Gold. Studio G Pigment Ink in aqua blue.
Font – PW Christmas Font
Stamps – Enjoy the Season Sentiment and Snowflakes Woodblock Rubber Stamp set.
Sequins

I’ve Been Published!!!

I’m really excited to share that my cards have been published in my first magazine EVER!!!  MPT was chosen to be featured as the “Blogger Spotlight” in Die Cut Crazy Magazine’s December 2013 issue!

DieCutCrazyMagDec2013cover

You can check out the Die Cut Crazy Magazine world here.  It’s really a fabulous magazine that publishes to Iphone, Ipad and PDF. It has great examples of die cuts and cards, and offers step-by-step instructions for a variety of cards and cardmaking techniques. If you are a fan of cardmaking, I would definitely recommend checking out this magazine. (By the way, I was not asked to write a review – I honestly think this is a great magazine!)

I would like to give a big shout out to Stephanie Shock, editor-in-chief for finding my cards online and inviting me to contribute. She was so professional throughout the process. I wish her and her cohorts the best of luck on the future success of the magazine.

P.S. One of my Christmas cards is also featured in the Reader Gallery section!  What a great way to end the year on a high note!